Showing posts with label tp. Show all posts
Showing posts with label tp. Show all posts
Monday, March 20, 2017
configure Access Control on TP LINK Wireless N Router
configure Access Control on TP LINK Wireless N Router
How to configure Access Control on TP-LINK Wireless N Router
Suitable for: 3G/4G Routers, 300Mbps Wireless N, 150Mbps Wireless N
The wireless N Routers which can provide convenient and strong internet access control function, can control the internet activities of hosts in the LAN. Moreover, you can flexibly combine the Host List, Target List and Schedule to restrict the Internet surfing of these hosts.


Step 1 Open the web browser and type the IP address of the router (default is 192.168.1.1 or 192.168.0.1) or http://tplinklogin.net into the address bar and then Press Enter.
Step 2 Type the username and password in the login page, the default username and password are both admin.
Step 3 Host Setting
Click the Access Control ->Host, and click Add New to edit the rule.
(1) Select the IP Address in mode field, then enter a short description in Host Description field. Enter the IP address range of your network which you want to control (i.e. 192.168.1.100-192.168.1.119, which will be blocked access to the sites you define in the following steps). And Click Save to save the settings.
(2) Select the Mac Address in mode field, then enter a short description in Host Description field. Enter the MAC address of the computer and the format is xx-xx-xx-xx-xx-xx. And Click Save to save the settings.
Note: As one rule can only add one MAC address, if you want to control several hosts, please click Add New to add more rules.
Step 4 Target Setting
Click the Access Control ->Target, and click Add New to edit the rule.
(1) Select the IP Address in Mode field, then enter a brief description of the rule you are setting up. And type the Public IP range or specific one which you want to block in IP Address bar. And then type the specific port or range of the target in Target Port bar. And Click Save to save the settings.
For some common service ports, select one from the drop-down list, and the corresponding port number will be filled in the Target Port field automatically.
(2) Select the Domain Name in Mode field, then enter a brief description of the rule you are setting up. Type the domain name which you would like to be ruled in the Domain Name bar (you do not have to fill full web addresses such as www.google.com –simply entering ‘google’ will set the rule to block any domain name that contains the word ‘google’) And Click Save to save the settings.
Step 5 Schedule setting
(1) Click the Access Control ->Target, and click Add New to edit the rule.
(2) Select the Day mode, then enter a brief description of the rule you are setting up. You can select the certain day (s), or choose Everyday. What’s more, you can also select the certain time to get onto the Internet with Time mode, you can select 24 hours, or specify the Start Time and Stop Time yourself (The format is HHMM, for example, 0800 represents 8:00). And Click Save to save the settings.
Step 6 Click the Access Control ->Rule, and tick Enable Internet Access Control. Then tick Allow the packets specified by any enabled access control policy to pass through the Router, and click Save to save the settings.
Step 7 Click Add New... button to add a new rule, then enter a brief description of the rule in Rule Name field, and select the certain description you have set before in each subtype field, then select Allow in Action field and Enable in Status field, then click Save to save the settings.
Then you will go back to the Access Control Rule Management page and see the following list, which means you have set Access Control rules successfully. This setting means you can allow the host with specific IP/MAC address to access the certain website only during the time and date you have set, and forbid other hosts in the LAN to access the Internet.
Available link for download

Sunday, February 19, 2017
How to install TP LINK wireless router
How to install TP LINK wireless router
How do I install TP-LINK wireless router to work with DSL Modem (PPPoE)
Suitable for: 300Mbps Wireless N Routers, 150Mbps Wireless N Routers, 54Mbps Wireless G Routers, N750 Wireless Dual Band Routers, N600 Wireless Dual Band Routers, N900 Wireless Dual Band Routers
This FAQ is for the users who use PPPoE service and DSL Modem. If you are using Cable Modem, please ignore the article, and refer to How do I configure my TP-LINK wireless router to work with a Cable Modem (Dynamic & Static IP).
Step 1: Before you Begin
Before you begin, please refer to this article: What do I need prepare before begin to install TP-LINK Wireless Router.
- Make certain the ISP had already provided DSL Broadband Service (PPPoE) to you.
- Please connect the router to the computer which used to connect directly to your modem.
- Only use the Ethernet port on the modem. If you were using the USB connection before using the router, disconnect the USB cable and connect an Ethernet cable to the WAN port of the router.
- Make certain that you had disabled or uninstalled other third part PPPoE dialing up software such as WinPoet, Broadjump, or Enternet 300 from your computer, otherwise you will not be able to connect to the Internet. Some ISPs also provide similar PPPoE dialing up software.
Note: Before connect the router to your modem, make certain that the DSL modem work on Bridge mode, but not work on router modem.
Step 2 Connect your Network
1. Turn off your DSL modem, router and computer.
2. Connect the WAN port of the router to the LAN port of your DSL modem with Ethernet cable.
3. Connect the phone line (DSL Line) to the Line port of your DSL modem.
4. Connect your computer to one LAN port of your TP-LINK router.

Step 3 Configure TP-LINK Router
1. Power on your router and computer. Open the web browser and type the LAN IP address of the router in the address bar (default is 192.168.1.1). Press [Enter] key.

2. Type the username and password in the login window (the default username and password both are admin), then click OK.

3. Click Network->WAN on the left side, change the WAN Connection Type to PPPoE.

4. Enter your PPPoE username and password which are provided by your ISP.
If you want to connect to Internet automatically, please change Wan Connection Mode to Connect Automatically, which supports your router always connect to the Internet even if it’s not in use. 
5. Click Save to save your settings, then the router will connect to Internet after a while.
Step 4 Wireless Setting
If your router is a wireless router, please configure the basic wireless settings for your wireless network. Then continue to Step 5.
Step 5 Power Cycle
After done the configurations, you’d better do a Power Cycle, it will make your network work more stable.
1. Turn the cable modem off firstly, then turn your router and computer off, and leave them off for about 2 minutes;
2. Turn the cable modem on firstly, and wait till the modem works stable (All LED lights work normally).
3. Turn the router on and wait about 1 minute, and then power on your computer.
4. Repeat the steps 1-3 above until you connect to the Internet.
Available link for download
Tuesday, January 17, 2017
TP Link USB WiFi Driver Free Download For Windows XP 7 8 And Windows Vista
TP Link USB WiFi Driver Free Download For Windows XP 7 8 And Windows Vista
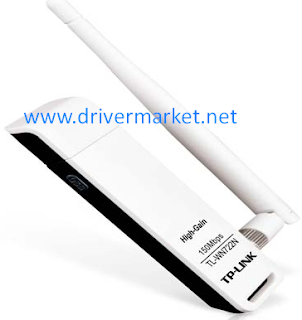
TP-Link WiFi USB driver free download link is available in the below of this post to get for absolutely free. In this post, we are going to share latest TP-Link WiFi USB driver for all windows operating systems. Download latest USB driver of TP-Link WiFi for windows OS and install it on your system. Latest version of TP-Link WiFi USB driver is provided in the end of this article to download for completely free for all windows 7, xp and windows 8 or vista. USB TP-Link WiFi driver is now released and available to download for windows operating systems. Get the driver by just a click on the provided shared link in the last row of the post and click to get it your own. WiFi USB driver is very important to connect your USB TP-Link WiFi with your computers. Just download and install the WiFi USB TP-Link driver in your computer windows operating system and get connect your WiFi.
Description: USB TP-Link WiFi Driver Free Download
Supporting OS: Windows 7, 8, XP And Windows Vista (32-Bit or 64-Bit)
TP-Link WiFi USB Driver Download
Available link for download
Subscribe to:
Posts (Atom)