Showing posts with label disk. Show all posts
Showing posts with label disk. Show all posts
Saturday, March 18, 2017
USB Disk Security 6 0 0 126 Full Version Free
USB Disk Security 6 0 0 126 Full Version Free
USB Disk Security 6.0.0.126 Full Version Protect your USB drive from infection
100% Protection against any threats via USB drive and protect offline computer.
USB Disk Security is a program that aims to detect any virus before it has a chance to infect your memory stick.

This is Torrent Download file. You must be Install µTorrent in your System.
USB Disk Security 6.0.0.126 Full Version Free Download
Available link for download
Tuesday, February 21, 2017
How to Manage Hard Disk Partitions in Linux
How to Manage Hard Disk Partitions in Linux
A logical disk/partition is a logical division on the hard disk. The partition table stores the info about various partitions on the disk. In Linux system, one partition is required as a root file system and the second partition as swap partition. In case of large disk sizes, often you can find a partition that stores the kernel image, data needed by BIOS at BIOS and some other auxiliary files. This partition is mounted on location /boot and carries the information required at boot time.
About Fdisk: While Fdisk prints a partition table it matches the physical and logical start and end points. After verifying that those parameters are equal, the partition list is printed.
Fdisk is a text based utility to manage Linux partitions. It is also known as Partition table manipulator for Linux. Using the tool, you can perform various operations such as: viewing existing partitions, new partition creation, add a partition, partition deletion or modification. The utility let you create primary and logical partitions on the disk. The maximum allowed number of primary partitions is four; the number of logical partitions may vary according to disk size.
First create a disk partition, after that you can install your operating system. After you create a hard disk partition you should now use the format tool for formatting them.
To make Linux partitions, you can use the Linux fdisk or Linux cfdisk program. Using the Fdisk utility, you can create four primary partitions. Open command prompt, run fdisk command. To make changes to the partition table, first you need to issue the write (w) command. The Fdisk option ‘w’ let you to write the new partition table and exit. If you want to quit without saving changes then use the fdisk command with q option.
For a hard disk larger than 512 megabytes (MB), you have two format options. You can choose either FAT16 or FAT32 file systems. Using the ‘File Allocation Table’ file system, data can be stored/accepted/retrieved in the hard disk. In case of FAT 16, the maximum allowed space for a drive letter is 2 GB. In case of FAT 32, the maximum size of drives can be up to 2 terabytes and minimum 512GB.
Below given are some options with the fdisk command:
1 View partition:
# fdisk -l: This command will let you view all partitions on all the hard disks connected to your system.
The partition list will be displayed along with the device name.
If you want to view partitions on a specific device only then you can do by mentioning the device name along with fdisk -l command.
e.g. # fdisk -l /dev/sda
Here /dev/sda is the harddisk name
The Fdisk option ‘p’ lets you print the partition table.
Run the Fdisk command:
# fdisk /dev/hdb
Command (m for help): p
The above command will print the partition table.
2 Delete partition:
First delete all exiting partition using the command:
# fdisk -d
Now run the below command to create new partitions
# fdisk -n/dev/sda
Create a new partition: fdisk n
3 fdisk –s:
Let you view the size of partition
# fdisk -s /dev/sda7
-s partition let you print the partition size (in blocks) on the standard output.
4 fdisk Expert Command f:
You can enable or disable the boot flag for a partition.
While you delete partitions and create new ones. The partition order of the new partitions may get un ordered. You can ‘Fix the Partition Table Order’.
5 -b sectorsize: This option let you specify the sector size of the disk.
6 -h: This option let you print help and then exit.
7 -c: This option let you switch off DOS-compatible mode.
8 -C cyls: This option let you specify the number of cylinders of the disk.
9 -H heads: This option let you specify the number of heads of the disk. (Not the physical number, of course, but the number used for partition tables.) Reasonable values are 255 and 16.
10 -S sects: This option let you specify the number of sectors per track of the disk.
11 -u: This option let you view sizes in sectors instead of cylinders while listing partition table.
12 –v: This option let you Print version number of fdisk program and exit.
Note: While using fdisk command, perform the actions carefully and prejudicially. Because once you format or delete a Linux partition using the command there is no direct way to get the data back. Whether its accidental or intentional deletion, if you want to get you lost Linux data back you will have to run some Linux recovery software that let you scan your drive for the lost partition data and save the recoverable items at your desired location.
Available link for download
Thursday, February 2, 2017
CHKDSK How to Use This Evergreen Disk Repair Command in Windows 8
CHKDSK How to Use This Evergreen Disk Repair Command in Windows 8
Often times, we need to repair hard disks to overcome from various errors and problem that we might face almost every day. Check Disk utility in Windows is still a winner among various other free utilities provided from Microsoft that we use to check hard disk errors and repair them, even in Windows 8.
Previously, Disk Check utility comes with slight differences and limitations that may have lifted in Windows 8. Checking your hard disk in Windows 8 through CHKDSK command every once in a while will ensures healthy performance of your PC. You can use it anytime to deal with various problems such as improper shutdown, third party hefty software, file system corruption, disk structure corruption etc.
How to run CHKDSK in Windows 8
Microsoft has completely redesigned Check Disk utility in Windows 8 to meet the growing needs of user who found themselves incapable to deal with various hard disk issues such as bad sectors and blocks, freezing issues, automatic restart etc. Microsoft has also introduced Automatic Maintenance to run in the background and repair errors if it founds any. However, if you want to run check disk command at any particular instant or to address any particular issues, you can do so by following the steps below:
- Simply right click on any drive listed under ‘This PC’ window and choose ‘Properties’
- Navigate to ‘Tools’ tab and click on ‘Check’ button listed under ‘Error Checking’ rectangular box.

- System error checking process will begin immediately and will report any errors that it founds. In case, check disk utility don’t found any errors you will get a confirmation dialog box stating ‘You Don’t need to scan this drive’. Still not satisfied, you can proceed to perform disk error check by clicking on ‘Scan Drive’ button.

- Disk scanning for errors and corruption is faster than ever. The whole system check can be performed in minutes.

- Once the Scanning is completed, you’ll get a confirmation dialog box stating ‘Your Drive was successfully scanned. Now Errors were found. ’

- You can also choose an option to scan and repair drive together. This option is limited to Window default bootable drive containing your system files.

- You can also chose to repair the problem drive on next restart. Additionally, if the drive you’re trying to repair is default windows drive, Windows will ask to repair this drive on the next restart to make sure that nothing bad will happen.

- That’s it. Check disk utility perform well and helps you deal with any minor or major disk related errors or problems.
Steps to deal with disk related errors and problems
There are number of Disk related errors exist and one can happen anytime on your system. Some error sounds not that typical and can be dealt and fixed easily. However, most of the time not. Below mentioned are few particular type of disk related problems that may occur on your system:
A disk read error occurred
Disk Read or write error
A disk read error occurred. Press Ctrl+Alt+Del to restart.
Once such error strikes to your system, you’ll face freezing, interrupted shutdowns, slow system processing while accessing any files etc. Besides number of reasons that could cause this, first things you’ll need to do is to perform disk check. Follow the steps described above to check hard disk for errors and problem on your Windows 8 PC. In case you are using older version of PCs i.e. Windows 7, Vista, XP etc., you can still use the same operations except #1 (This PC was entitled as ‘My Computer’ previously).
To deal with such hard disk related problems, you’ll need to perform few others troubleshooting steps like testing your memory, replacing the problem drive, resetting or updating the BIOS etc.
If the above problems continue to exist even after following all the above troubleshooting steps, you’ll need to proceed with installing a fresh copy of Windows or even worse, have to format the drive completely. This could permanently delete files that you’ve stored on the problem drive or volume and will found no way back to restore it other using standard hard disk recovery tools provided by various software vendors across the globe, see some disk recovery tools here. It is specifically designed to handle data loss situations carefully and restore files with their actual names.
Benefits of using Disk Check Utility against various other disk repair tools
You may find number of tools designed to address disk related issues. These tools can check your hard disk for possible causes and may repair them immediately. However, you’ve to use such tools with caution as it may harm your computer and make the situation worse.
Running disk check utility provide no harms to your system whatsoever is completely safe. It’ll do no harm if no good. It’s also recommended that running check disk operations once in a while will make your PC functioning smoothly and avoid crashes or sudden system restarts.
Available link for download
Sunday, January 15, 2017
How To Recover Data From Corrupted Hard Disk USB Drive
How To Recover Data From Corrupted Hard Disk USB Drive
Requirements
MiniTool Power Data Recovery
Download From HERE
For Instruction Follow This WebSite
https://www.powerdatarecovery.com/powe
Dear sir/madam,
Thank you for participation. Following is the license code
======================================================================
Product name: MiniTool Power Data Recovery
License Code:
OGQxMTQwZmItZTJlNjFlNmYtZGM5ZTUzNWEtNWMwZGFiNjMtZDdlNDI4MmUtZDJmN2IyZDQtZTIzZjkxYTI=
License type: Personal License
Available link for download
Saturday, January 7, 2017
Fix External Hard Drive Error The Disk Structure is Corrupted or Unreadable in Windows 7
Fix External Hard Drive Error The Disk Structure is Corrupted or Unreadable in Windows 7
External hard drive are more popular these days because of their portability and availability in verity of sizes (still growing). It offers flexibility to carry large amount of data as well as helps you restore data if the primary location becomes inactive or seriously damaged. However, at times, external hard drive itself becomes inaccessible or prevent users to access the stored files. Be it virus infection, directory structure corruption, file system damages etc.
Once such external hard drives holding GB’s of valuable stuff, you may become panicked and frustrated as you’d have no idea about how to deal with such problems. Disk Structure corruption is yet another common error that comes whenever you tries to access your external hard drive and prevent users to access or copy the stored files.
As all of your files were stored there, formatting will permanently wipes your important files and make it permanent non recoverable even by using professional recovery tools. We’ll go through series of steps mentioned in this tutorial to fix this error easily (if you are lucky) and retrieve all of your important files as well as make the external drive usable again.
Below are the common error types you’ll see once similar situation strikes to your external hard drive:
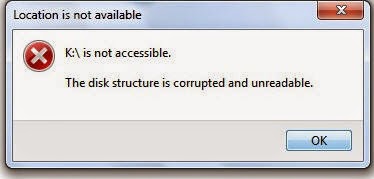
Error 0x80070571 : The disk structure is corrupted or unreadable
This disk in the drive is damaged
Please format this disk!!
The Drive isn’t accessible
The disk in drive is not formatted. Do you want to format it now?
Common reasons behind this error
External hard drive is created using moving mechanical moving parts which will may fails either sooner or later. Some unavoidable instances makes these drive inaccessible or damaged immediately and makes user data beyond the reach of known recovery software. Below are the some common reasons responsible for this situation:
- Improperly connecting or removing the drive
- The file system itself become damaged cannot be used to access the drive
- File system has become RAW which cannot be used any longer to access, manage or format the drive. In most instances, those drives becomes completely unusable.
- Large number of bad sectors and blocks has been emerged which prevents externally drive to perform normally. You’ll get freezing, hanging, corrupt files or similar issues when bad sectors took place on your drive.
Troubleshooting steps
As the drive is going through serious damages, there is no guarantee that any specific or subsequent steps could help you fixing the problem. However, let’s follow the standard procedure to deal with this error and see if we may able to resolve it:
- Right click on My Computer and choose Manage.
- Enter administrative details if asked and hit enter
- Go to Disk Management located under Storage at the left hand side menus.
- From the image below, check and make sure that any or all the volumes is listed along with the drive that’s connected externally. If you’ve recently faced the above mentioned error, you’ll see the volume status as RAW or offline
- Right click on that drive and choose to format it. As stated earlier, formatting will permanently wipes off all your important files and folders and your hope to get it back ever.
- Alternatively, you can right click on the external drive from Windows explorer interface and go to its properties.
- Choose the Tools tab and hit enter after selecting the check box stating ‘Check this disk for errors’.
- Once the operation completed successfully, try restarting your system and see if the error resolved.
Nothing helps, still can’t able to retrieve files?
Many times, the error will continue to persist even after following all the troubleshooting steps carefully. Additionally, nothing matters except your precious files that still clicking somewhere on your hard drive, right?? Don’t worry, as we are covering up some really useful utility that helps windows enthusiasts in getting back their data from various crucial situations of data loss like above.
Stellar Phoenix Partition Recovery is a life savior utility that can easily detect drives (both internal and external) going through serious damages and later, allows you to safely restore all your important files. Download the software from here and install it on your PC. Once installed, start the software from the desktop or installed software location. Make sure the drive is connected properly and shown in the software interface.
This tool offers powerful recovery options to recover data even from the severely damaged or inaccessible drives. As talked in the situation above and if the problem drive status is shown as RAW, you’ll still be able to recover data from RAW drives using this efficient partition recovery tool.
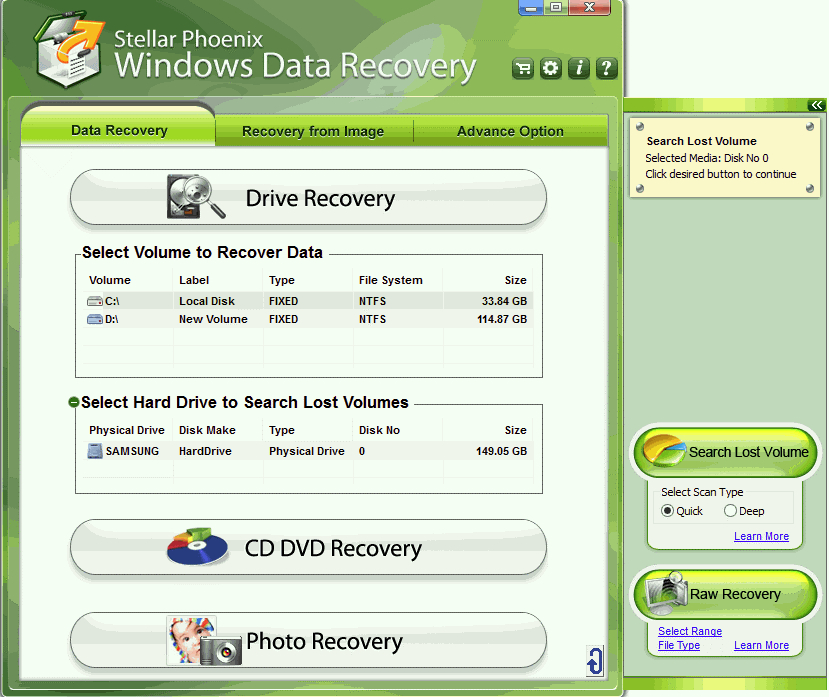
Click on the problem drive, listed under ‘Data Recovery’ > ‘Drive Recovery’ tab. The subsequent recovery methods will pop up as soon as you click on any particular drive or volume. Choose ‘Advanced Recovery’ from the available methods and let the software scans your drive completely (do not stop scanning at mid). Don’t panic if the software is taking too long to scan your problem drive. It may also possible that sometime the whole system freezes and needs you to restart the it. That’s because of the data recovery tools limitations and drive nature (RAW status) which takes really tough luck to getting detected on the system and recover data off the drive.
Once the scanning is completed, you’ll be able to see preview of any or all the recoverable files and folders using the preview pane, located at the top right corner. Chose or select desired files for recovery and click on Recovery button. Make sure that you’ve activated the software before start recovering your files as saving is disabled in demo version.
Do let us know your feedback or your particular situation if the error still persists!!
Available link for download
Sunday, October 30, 2016
Download Universal MultiBoot Disk 8 0 RC2 Lite USB Disk 2011 with Updated
Download Universal MultiBoot Disk 8 0 RC2 Lite USB Disk 2011 with Updated

Multiboot disk-based boot grub4dos + Bootable CD Wizard. As the primary boot to CD DVD for reliability on bcdw, but their menu does not have a menu at once is grub4dos.
Before:
Windows LiveCD SV-Micro PE 2k10 conty9 PlusPack 1.6.5
Windows LiveCD LEX DX Media 11.6.5
Windows LiveCD STEA Edition 0811 plus
Windows LiveCD SysTools 5.6 PE7 LeoZhu 12.05.11
Windows LiveCD RusLive Ram Special Edition 2k10 1.6.5
Windows LiveCD Win7Live Special Edition 2k10 1.6.5
Windows LiveCD Hirens BootCD 14
Hirens BootCD 14
Parted Magic 6.6
Acronis & Paragon & Other Utilities:
Acronis Backup & Recovery Workstation 10.0.11639
Acronis True Image Enterprise Server 9.7.8398
Acronis True Image Home Plus Pack 13.0.7046
Acronis True Image Home Plus Pack 14.0.6597
Acronis Disk Director Server 10.0.2169
Acronis Disk Director Home 11.0.2121
Paragon Home Expert Pro 2011 v10.0.15.12650
Windows Key Enterprise 9.3.815
Recovery Console Windows XP
Windows:
Windows 7 Ultimate SP1 RTM x86-x64 Rus MSDN 11-in-1 + MSDaRT 6.5
Windows XP Pro SP3 RU VLK 20.07.11 simplix (Manual)
Windows XP Pro SP3 RU VLK 20.07.11 simplix (Unattended)
Test:
QuickTech Pro 5.8
GoldMemory Pro 6.92
Linux Memtest86 + v4.20
MS Memory Diagnostic
MHDD HardDisk Tools 4.6
Victoria HDD scan 3.52
HDDTools from Systools 4
How to use
Burn any good program, ImgBurn, InfraRecorder, UltraISO. Boot from CD and try it!
Option to install on a flash drive 1:
Find the manufacturer of your flash chip, download the desired utility and write the image to stick as USB-CDROM
Replacement of the distribution of Windows 7
When you add a distribution of Windows 7 to copy all the folders and files (setup.exe and autorun.inf are not needed) in the root directory, just match the folder boot, and in it the folder fonts, ru-ru files and boot.sdi, bootsect . exe, etfsboot.exe, memtest.exe which can be easily replaced. The other folders (efi, sources, upgrade, support) and the file bootmgr simply copied without replacement. Register in the setup menu windows can be in the files win1.lst, win2.lst, win3.lst, which correspond to the graphic menu (high and low resolution) and a text menu.
Changes in 8.0RC -> 8.0RC2
Windows XP Pro SP3 VLK Rus simplix edition (x86) 01.07.2011 -> Windows XP Pro SP3 VLK Rus simplix edition (x86) 20.07.2011
STEA Edition 0511 plus -> 0811
Parted Magic 6.2 -> Parted Magic 6.6
Sound and video drivers from version 8.8.11 nat27
Download :
Please Leave your mail ID in comments .
Available link for download
Subscribe to:
Posts (Atom)