Showing posts with label tool. Show all posts
Showing posts with label tool. Show all posts
Saturday, July 29, 2017
Micromax Bolt A082 Flash done with SP flash tool tested
Micromax Bolt A082 Flash done with SP flash tool tested
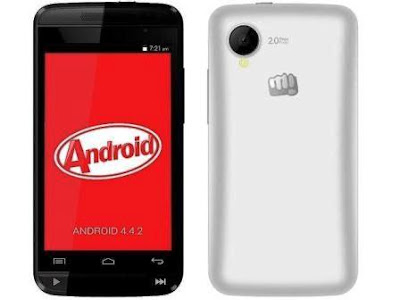
Before use this tutorial first read all tutorial carefully after following step by step and any problem using this tutorial then leave comment on below comment box i will soon good reply with also remember before use this tutorial also check device in hardware if hardware issue in device and try to flash using this tutorial then your device will be dead or other issue so first check in hardware after try in flash tutorial when device customer take this device for software then in hang issue so i use below firmware or flash tool so i was success and problem was solve of hang on solution but remember not only hang on logo solution but your device if restarting issue, hang issue then you can use this tutorial please carefully use this tutorial and read below description about firmware.
This flash file tested by me without any error working well, you can use this flash file when your device hang on logo problem, restarting problem, security lock problem, password lock problem, pattern lock problem etc software related problem and you can use this tutorial without any box and this is free for all who know about software in mobile, impotent for flashing first must check your micro usb cable if not good then you cant flash it so check micro usb cable second check your device battery that is impotent for flashing if your device battery low so stop your device between flash so this is impotent for flash, before you flash save your data like contact, photos, videos etc because this is factory flash file so you cant save after full flash so must remember all are impotent notes.
Download Link
Micromax A082 Stock ROM Firmware Download here
SP_Flash_Tool_v5.1343.01 Flash tool Download here
Micromax A082 USB Driver Download here
Required for flash:
1. Micromax Bolt A082 device with good battery charged
2. Micromax Bolt A082 tested firmware
3. SP_Flash_Tool_v5.1343.01 Flash tool
4. Micro usb cable
6. Computer or Laptop
Procedure:
1. Download tested firmware from above link (if link not working just leave your comment on below comment box)
2. Extract to both files into desktop or as you like path (must be installed winrar software in your computer)
3. Open SP_Flash_Tool_v5.1343.01 folder and choose flash_tool.exe file and open it
4. Click on Scatter-loading button and choose MT6572_Android_scatter.txt file
5. Now click on Download button
6. Press and hold Volume UP button and insert usb cable
7. Wait until driver install, if driver installed in your computer then download start automatically into device
8. Wait until full install (do not try in unplug while your device in flashing mode)
9. Congratulation you are done
Micromax Bolt A082 Flash done with SP flash tool screenshot;
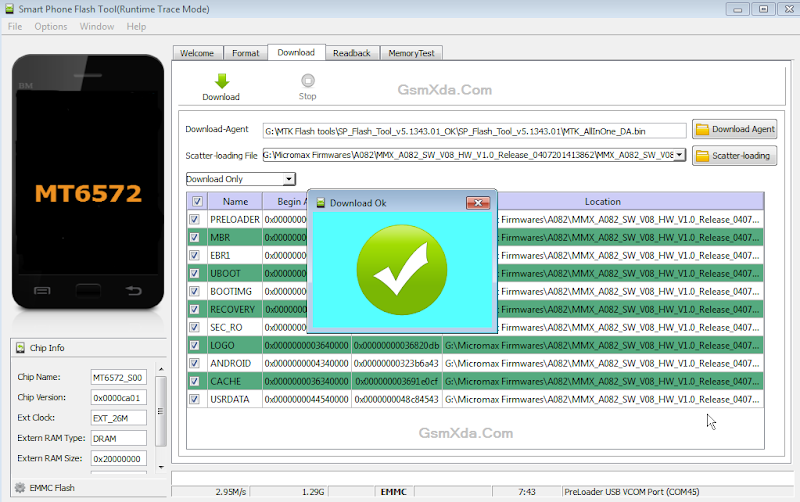
Micromax Bolt A082 Flash done with SP flash tool Video HERE
Available link for download

Thursday, March 30, 2017
How to Flash or Upgrade BSNL Penta WS702C with Flash tool tested
How to Flash or Upgrade BSNL Penta WS702C with Flash tool tested
When you try to Flash or Upgrade of BSNL Penta WS702C, remember some impotent notes, first of must be tablet charged, this is easy way to Flash or Upgrade if you understand and this is AllWinner CPU so for that different flash tool and Stock ROM Firmware is .img file not like scatter or .pac last two is running in mostly device but in this different so method also different, you can use this flash file when your device hangs on logo problem, restarting problem, security lock problem, password lock problem, pattern lock problem etc software related problem, before use preparation for flash, Stock ROM Firmware, USB Cable, Flash tool, Driver, Computer or Laptop and in requirement where mention like which cable to be, about Stock ROM, about USB Driver also with link just follow that, take all type data in your tablet because this is factory stock ROM, if data in SD Card so dont worry its be safe but remember not to be in internet storage and this flash file tested by me without any error working well
And you can use this tutorial without any box and this is free for all who know about software in mobile, impotent for flashing first must check your micro USB cable if not good then you cant flash it so check micro USB cable second check your device battery that is impotent for flashing if your device battery low so stop your device between flash so this is impotent for flash, before you flash save your data like contact, photos, videos etc because this is factory flash file so you cant save after full flash so must remember all are impotent notes.
And you can use this tutorial without any box and this is free for all who know about software in mobile, impotent for flashing first must check your micro USB cable if not good then you cant flash it so check micro USB cable second check your device battery that is impotent for flashing if your device battery low so stop your device between flash so this is impotent for flash, before you flash save your data like contact, photos, videos etc because this is factory flash file so you cant save after full flash so must remember all are impotent notes.
Requirement:
- BSNL Penta WS702C Tablet with charged battery up to 80%, do not try with low battery otherwise dead will be dead or another issues
- BSNL Penta WS702C Tablet Flash file its must be working well means not to be corrupted, you can download tested from this link | Download here
- BSNL Penta WS702C Tablet Flash tool | Download here
- BSNL Penta WS702C Tablet USB Driver | Download here
- Good Quality Micro USB Cable
- Computer or Laptop
Method to Flash or Upgrade for BSNL Penta WS702C:
- First Download required from the above link, if link dead or other problem just leave your comment on below comment box
- UnZip all are files from WinZip to Desktop or As you like path, must be installed WinZip in your computer or laptop for Extract
- Open Update tool folder and choose LiveSuit.exe file and open it
- YES button for Continue and NO for Cancel so choose YES button
- General Mode for Upgrade mode, Mandatory Mode for Update Mode (Recommended) so choose General
- Now choose YES and choose DZHW-A088hd-dou-XXXA-B-M1190-5875y-V2.0-20120907.img file from the img folder
- Press and hold Volume Down and insert USB Cable and wait until driver installing, if not installed then try to manual and update from above links driver
- After Installed Driver, Download start automatically and wait until full process, do not try to disconnected device while in flashing mode
- Congratulation you are done
BSNL Penta WS702C Flash done Screenshot and Video :
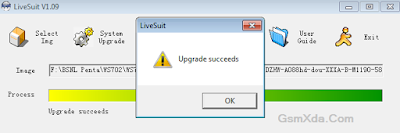
Available link for download
Wednesday, March 29, 2017
How to Flash Lenovo A536 with SP Flash Tool Tested
How to Flash Lenovo A536 with SP Flash Tool Tested
If any problem in Lenovo A536 use this method really working easy to flash without any error and remember do not try with wrong stock ROM because device will be dead so carefully use this guide really working well, Lenovo A536 in any type issue software related you can easy solve using this method and this is for everyone who new fresher technician or experience technician in android software related, before use remember of must be working well all are required which you can see in this method it below to be mention, different to be error when you try to flash or upgrade first of USB not recognized this error possible when micro USB not working, battery not charged, phone USB socket not working properly so if you fail with this method just write down your comment on below comment box i will soon possible to fix it, first take backup into device if live otherwise dead you cant take backup, this guide you can use when device in dead condition also but must be in software related issue otherwise if any hardware then you can solve that.
If you want to repair your device, you can try to repair it by you. You have to charge your battery with any charger and charged it by 85%. Your data is very important for you so it is good to do a backup of your data it may consist like your contact details,your important messages, your emails or any other important thing which you feel to be the backup in your device. This backup can be done on another device. we have to do the backup because after a format of your device, all your data will be gone and it will not be recovered. For backup in other devices you can use other external device like your hard drive, SD card or any other suitable devices. If you are doing by your own.do it at your own risk as we dont take any responsibility if your device is damaged
When you use this method ?
This method you can use without any box its done from flash tool its also available here, and impotent of must be installed phones driver, you cant flash or upgrade if not installed in your computer or laptop it must be installed and also available in this post, here all are linked that tested and working fine just in one try, you can use this guide when your device in hang on logo, restarting, auto turn on internet connection, auto turn on WiFi connection, auto apk installing, auto gone balance, pattern lock, screen lock etc these type issues you can use this way.
Requisite for Lenovo A536
- Lenovo A536 phone with good battery charged, do not try with low battery
- Lenovo A536 Stock ROM Firmware Tested | Download here
- Lenovo A536 Flash Tool | Download here
- Lenovo A536 USB (Flashing) Driver | Download here
- Computer or Laptop
- Good Quality Micro USB Cable
Procedure for Lenovo A536
- First take files from above link, if link not working just leave your comment on below comment box i will soon fix if possible
- Install WinZip software in your Computer or Laptop, if already installed then ignore
- Extract to desktop or as you like path from the WinZip
- Open SP Flash Tool folder and choose flash_tool.exe file and open it
- Click on Scatter-loading button and choose MT6582_Android_scatter.txt file from the Stock ROM firmware folder
- Click on Download button then Just Insert USB Cable into device
- Wait until driver installed automatically, if not installed auto then just manual update from above links driver
- If device dead or not detect then use Press and hold Volume UP button and Insert USB Cable (Note: You can use Volume Down button for detection)
- Wait until finished process, do not try to unplug while device flashing mode
- Congratulation you are done
Lenovo A536 Flash done Screenshot:
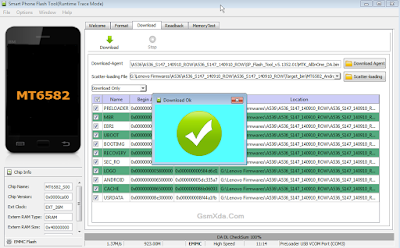
Available link for download
Monday, March 20, 2017
How to Flash Intex NEO V Plus with Flash tool tested
How to Flash Intex NEO V Plus with Flash tool tested
This guide to Intex NEO V Plus for phone not starting means hang on logo you can use this easy way for solve problem, and if phone has dead you can this method its simple to use for that need flash file or flash tool tested, you can tested that download from in this post, you can use this flash file when your device hangs on logo problem, restarting problem, security lock problem, password lock problem, pattern lock problem etc software related problem and here no need to any box this job you can done without any box with simple method, before use remember must your phone battery charged and do not try with low battery cause in low battery giving flashing error like USB not recognized and also must installed USB Driver in Computer or Laptop, must be working Micro USB Cable also, now lets go how to flash Intex NEO V Plus with Flash tool ?
Required:
- Intex NEO V Plus phone with good battery charged, do no try with low battery
- Intex NEO V Plus Flash file | Download here
- Intex NEO V Plus Flash tool | Download here
- Intex NEO V Plus USB Driver | Download here
- Good Quality Micro USB Cable
- Computer or Laptop
Procedure:
- Download needed file from the above link, if link broke just leave your comment on below comment box
- UnZip to Desktop or as you like path from the WinZip, must be installed WinRAR or WinZip installed in your Computer or Laptop
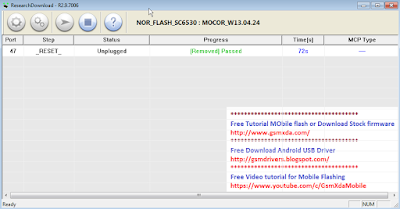
- Open ResearchDownload 2.9.7006 (GsmXda) folder and choose ResearchDownload.exe file
- Click on Flash Choose Button and select Intex_Neo V+_V01_WVB_Indian_SER.pac file
- Click on Download button (button are show like Play) just click there
- Press and hold Center key and Insert USB Cable and wait until driver installing, if driver installed then start process automatically if not just install from the above links driver
- Wait until Pass Process, do not disconnect device while in Flashing Mode
- You are done, Congratulation
Intex NEO V Plus Flash done with Flash tool Screenshot:
Available link for download
Sunday, March 19, 2017
How to Flash Gionee Elife E7 Mini with Flash tool simple way here
How to Flash Gionee Elife E7 Mini with Flash tool simple way here
Gionee Elife E7 very awesome phone and this device for using easy comfortable some time use internet connect in device then many issue comes on display like unfortunately, when you starting device then automatically restart, hang on logo problem any problem of software related this procedure its easy to everyone who working in software related here some impotent of before use this tutorial first read all are content to carefully after step by step using here we are try to very easy solution but if any problem using this tutorial just leave your comment on below comment i will soon with good reply or before using this tutorial please mention on required which are giving below must working well all are requireds if any problem then you cant flash or error on displayed see also mention below content of about firmware
This flash file tested by me without any error working well, you can use this flash file when your device hang on logo problem, restarting problem, security lock problem, password lock problem, pattern lock problem etc software related problem and you can use this tutorial without any box and this is free for all who know about software in mobile, impotent for flashing first must check your micro usb cable if not good then you cant flash it so check micro usb cable second check your device battery that is impotent for flashing if your device battery low so stop your device between flash so this is impotent for flash, before you flash save your data like contact, photos, videos etc because this is factory flash file so you cant save after full flash so must remember all are impotent notes.
Download link
Gionee Elife E7 Mini Stock Rom Firmware Download here
Gionee Elife E7 Mini Flash tool Download here
Gionee Elife E7 Mini USB Driver Download here
Need for Flash:
1. Gionee Elife E7 Mini device with good battery charged
2. Gionee Elife E7 Mini tested Stock ROM
3. Gionee Elife E7 Mini Flash tool
4. Gionee Elife E7 Mini USB Driver (for flashing)
5. Micro usb cable
6. Computer or Laptop
2. Extract to desktop or as you like path (must be installed winrar software in your computer)
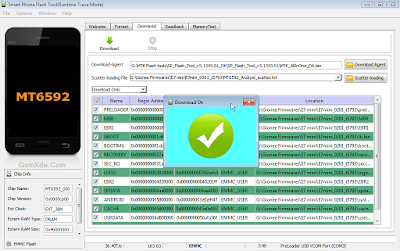
3. Open SP flash tool and choose flash_too.exe file and open it
4. Click on Scatter-loading button and choose MT6592_Android_scatter.txt file
5. Now click on Download button and Press and hold Volume Up button and insert usb cable
6. If driver not installed in your computer then update from above link driver
7. Wait until full install (do not disconnect when your device in flashing mode)
8. Congratulation you are done
2. Gionee Elife E7 Mini tested Stock ROM
3. Gionee Elife E7 Mini Flash tool
4. Gionee Elife E7 Mini USB Driver (for flashing)
5. Micro usb cable
6. Computer or Laptop
How to Flash Gionee E7 Mini with flash tool ?
1. Download tested firmware, Flash tool or usb driver from above link2. Extract to desktop or as you like path (must be installed winrar software in your computer)
3. Open SP flash tool and choose flash_too.exe file and open it
4. Click on Scatter-loading button and choose MT6592_Android_scatter.txt file
5. Now click on Download button and Press and hold Volume Up button and insert usb cable
6. If driver not installed in your computer then update from above link driver
7. Wait until full install (do not disconnect when your device in flashing mode)
8. Congratulation you are done
Flash done Screenshot:
Available link for download
Friday, March 17, 2017
How to Flash Karbonn Titanium S4 Plus with Sp Flash Tool Tested
How to Flash Karbonn Titanium S4 Plus with Sp Flash Tool Tested
Actually this guide is no hard to use if you want to Flash or Upgrade Karbonn Titanium S4 Plus phone because this is tested by me without any error Karbonn Titanium S4 Plus in any type issue software related you can easy solve using this method and this is for everyone who new fresher technician or experience technician in android software related, before use remember of must be working well all are required which you can see in this method it below to be mention, different to be error when you try to flash or upgrade first of USB not recognized this error possible when micro USB not working, battery not charged, phone USB socket not working properly so if you fail with this method just write down your comment on below comment box i will soon possible to fix it, first take backup into device if live otherwise dead you cant take backup, this guide you can use when device in dead condition also but must be in software related issue otherwise if any hardware then you can solve that.
Must Follow:
If you want to repair your device, you can try to repair it by you. You have to charge your battery with any charger and charged it by 70%. Your data is very important for you so it is good to do a backup of your data it may consist like your contact details, your important messages, your emails or any other important thing which you feel to be the backup in your device. This backup can be done on another device. we have to do the backup because after a format of your device, all your data will be gone and it will not be recovered. For backup in other devices you can use other external device like your hard drive, SD card or any other suitable devices. If you are doing by your own do it at your own risk as we dont take any responsibility if your device is damaged
Required for Karbonn Titanium S4 Plus:
- Karbonn Titanium S4 Plus device with good battery charged, do not try to flash when battery in low condition
- Karbonn Titanium S4 Plus Stock ROM Firmware | Download here
- Karbonn Titanium S4 Plus Flash Tool | Download here
- Karbonn Titanium S4 Plus USB (Flashing) Driver | Download here
- Micro USB Cable with Good Quality
- Computer or Laptop
Procedure for Karbonn Titanium S4 Plus:
- Install WinZip or WinRAR Software in your Computer or Laptop, already installed ignore this
- Download all are files from above link which required for flash or upgrade, if link broke or not working just leave your comment on below comment box i will fix it soon if possible
- UnZip to all files anywhere you want from the WinZip
- Open SP Flash Tool folder and choose flash_tool.exe file and open it
- Click on Scatter-loading button and choose MT6582_Android_scatter.txt file from the Stock ROM Firmware folder
- Now click on Download button and Insert USB Cable into device, wait until driver automatically installing, if not take auto then manual update driver from the above links
- If device dead and not detect then try to Press and hold Volume Up and Insert USB Cable (Note : You can Try Volume Down Also for Detection if Volume Up button not working)
- After Device Detected then Downloading star automatically into device wait while finished the process (Note : Do not try to unplug while device in flashing mode)
- Congratulation you are done
Karbonn Titanium S4 Plus Flash done Screenshot:

Available link for download
Monday, March 13, 2017
Redmi Note 4G Model 2014712 Flash done with Mi Flash tool tested
Redmi Note 4G Model 2014712 Flash done with Mi Flash tool tested
This device in issue of hang on logo not ahead after full flashing i was different Stock Rom firmware use for flashing but no success so i search in internet for that solution and i found one but i dont sure about new solution but i understand just try and what happen using new found solution just unbeliever just few second done that really awesome for solution no need to flash no need new firmware download just connect device with fastboot mode and just run command in command prompt so if you some time will got solution just try and you will to be better but remember before use check below comment this new solution working well or not after try in flash some time dont show below comment and i try then device will dead or other issue so first read all are content after try step by step solution here some few description about firmware just see below
This flash file tested by me without any error working well, you can use this flash file when your device hang on logo problem, restarting problem, security lock problem, password lock problem, pattern lock problem etc software related problem and you can use this tutorial without any box and this is free for all who know about software in mobile, impotent for flashing first must check your micro usb cable if not good then you cant flash it so check micro usb cable second check your device battery that is impotent for flashing if your device battery low so stop your device between flash so this is impotent for flash, before you flash save your data like contact, photos, videos etc because this is factory flash file so you cant save after full flash so must remember all are impotent notes.
Download Link
Redmi Note 4G Model : 2014712 Stock ROM Download HERE
Redmi Note 4G Model : 2014712 MiFlash tool Download HERE
Redmi Note 4G Model : 2014712 USB Flashing Driver Download HERE


Required for Flash:
1. Readmi Note 4G device
2. Redmi Note 4G Stock Rom Firmware
3. Redmi Note 4G MiFlash tool
4. Redmi Note 4G USB Driver
5. Micro usb cable
6. Computer or Laptop
Formality:
1. Take tested Stock ROM firmware from above link (plz if link dead just leave your comment)
2. Go to Firmware winrar and please rename to .tgz, if is .gz or tar
3. Extract to desktop both winrar (Note : Must your firmware folder in desktop)
4. Open Mi folder and choose MiFlash.exe file and open it
5. Click on Browse button and choose firmware folder who in desktop (see below image)
6. Click on Point button near browse button and choose Advance option (see below image)
7. Choose Browse.. button to FastBoot scripts and choose flash_all_except_data_storage.bat file from desktop firmware folder (see below image)
8. Turn off device, Press the Volume Down + Power keys same time for enter Fastboot mode
9. Attach Micro usb cable and click on Refresh button in flash tool (for device detect or not)
10. If device detect with flash tool then click on Flash button
11. Wait until driver install, if driver installed in computer or laptop then downloading automatically start
12. Wait until full flash device
13. Congratulation you are done
Redmi Note 4G Model : 2014712 Screenshot:
Available link for download
Sunday, March 12, 2017
How to Flash Lava Iris Fuel 50 with Flash Tool Tested
How to Flash Lava Iris Fuel 50 with Flash Tool Tested
This guide very easy to use if you following step by step because this is tested by me without any error, Lava Iris Fuel 50 in restarting problem i decide to flash its first try then done no any error, this guide not for only restarting issue but you can use this when in hang on logo, restarting, auto turn on internet connection, auto turn on wifi connection, auto apk installing, auto gone balance, pattern lock, screen lock. If you want to repair your device, you can try to repair it by you. You have to charge your battery with any charger and charged it by 90%. Your data is very important for you so it is good to do a backup of your data it may consist like your contact details,your important messages, your emails or any other important thing which you feel to be the backup in your device. This backup can be done on another device. we have to do the backup because after a format of your device, all your data will be gone and it will not be recovered. For backup in other devices you can use other external device like your hard drive, SD card or any other suitable devices. If you are doing by your own.do it at your own risk as we dont take any responsibility if your device is damaged
Lava Iris Fuel 50 in any type issue software related you can easy solve using this method and this is for everyone who new fresher technician or experience technician in android software related, before use remember of must be working well all are required which you can see in this method it below to be mention, different to be error when you try to flash or upgrade first of USB not recognized this error possible when micro USB not working, battery not charged, phone USB socket not working properly so if you fail with this method just write down your comment on below comment box i will soon possible to fix it, you can use when device in dead condition also but must be in software related issue otherwise if any hardware then you can solve that, this flash file tested by me without any error working well,
Requisite for Lava Iris Fuel 50:
- Lava Iris Fuel 50 phone with good battery charged, do not try with low battery
- Lava Iris Fuel 50 Stock ROM Firmware (Tested) | Download here
- Lava Iris Fuel 50 SP Flash tool | Download here
- Lava Iris Fuel 50 USB Driver (for Flashing) | Download here
- Good Quality Micro USB Cable (do not try with market low quality USB cable) because some time not detect device
- Computer or Laptop
Method for Lava Iris Fuel 50:
- Download all needed flash files from above link, if link broke or not working just leave your comment on below comment box i will fix soon if possible
- Install WinRAR or WinZIP software in your Computer or Laptop
- Extract all files to anywhere path from WinZIP
- Open SP Flash Tool folder and choose flash_tool.exe file and open it
- Click on Scatter-loading button and choose MT6582_Android_scatter.txt file from the Firmware folder
- Click on Download button and Just Insert Micro USB Cable to device then wait until driver installing automatically
- If driver not installing auto then just manual update from the above links driver from the device manager
- If device dead then not detect with computer or laptop then Press and hold Volume Up button and Insert USB Cable to device, you can use Volume Down button also for detect
- After Installed driver device will be connected with flash tool and process starting, wait until finished process
- Congratulation you are done
Lava Iris Fuel 50 Flash done Screenshot:

Available link for download
Thursday, March 9, 2017
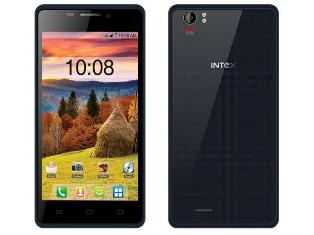
How to flash Intex Aqua Desire flash with sp flash tool see here with simple method
How to flash Intex Aqua Desire flash with sp flash tool see here with simple method
About Firmware or Tutorial:
This is tested firmware or flash tool you can do using this tutorial because this tutorial tested by me any error or issue and also this is simple method for everyone who know about android software related this tutorial use new user technician lets see how to flash intex aqua desire with sp flash tool ?
This flash file tested by me without any error working well, you can use this flash file when your device hang on logo problem, restarting problem, security lock problem, password lock problem, pattern lock problem etc software related problem and you can use this tutorial without any box and this is free for all who know about software in mobile, impotent for flashing first must check your micro usb cable if not good then you cant flash it so check micro usb cable second check your device battery that is impotent for flashing if your device battery low so stop your device between flash so this is impotent for flash, before you flash save your data like contact, photos, videos etc because this is factory flash file so you cant save after full flash so must remember all are impotent notes.
Download Link
Intex Aqua Desire Firmware or Flash tool Download here
Required for flash:
1. Intex Aqua desire device with good battery charged
2. Intex Aqua desire tested firmware or flash tool
3. Micro usb cable
4. Computer or Laptop
Procedure:
1. Download tested firmware or flash tool from above link (if link not working just write down comment on below comment box) 2. Extract winrar file to desktop or as you like path (must installed winrar software in your computer or laptop) 3. Open SP Flash Tool v3.1344.214 flash tool folder and choose flash_tool.exe file and open it 4. Click on Scatter-Loading button and choose MT6572_Android_scatter.txt file 5. Click on Download button and Press and hold Volume Up button and insert usb cable then wait until driver install if driver installed in your computer or laptop then downloading automatically start into android device 6. Wait until full os install in your device (not : do not disconnect device while your device in flashing mode) 7. Congratulation you are done from many problem and problem are mention above description.
Intex Aqua Desire Flash done with sp flash tool screenshot:

Intex Aqua Desire Flash done with sp flash tool video:
Available link for download
Saturday, March 4, 2017
HTC One Dual Sim 802W Flash done with HTC ARUWizard flash tool tested
HTC One Dual Sim 802W Flash done with HTC ARUWizard flash tool tested
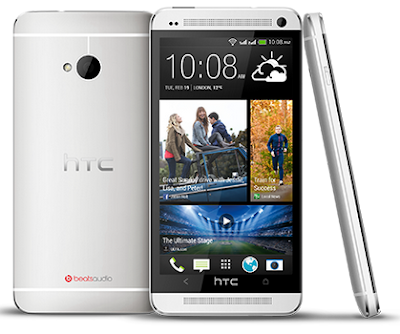
In this device different flashing way because in this device different CID different version number so please carefully in htc very complicated flash system some device you can flash from flash tool and some device flashing via CMD command base if you want to flash custom rom so must need to unlock bootloader after you can flashing custom rom.
This flash file tested by me without any error working well, you can use this flash file when your device hang on logo problem, restarting problem, security lock problem, password lock problem, pattern lock problem etc software related problem and you can use this tutorial without any box and this is free for all who know about software in mobile, impotent for flashing first must check your micro usb cable if not good then you cant flash it so check micro usb cable second check your device battery that is impotent for flashing if your device battery low so stop your device between flash so this is impotent for flash, before you flash save your data like contact, photos, videos etc because this is factory flash file so you cant save after full flash so must remember all are impotent notes.
Download Link
HTC One Dual Sim 802W Firmware download here
HTC One Dual Sim 802W Driver Download here
Note : This is tutorial tested in 7.17.401.5 HTC__A07 firmware
Note : This is tutorial tested in 7.17.401.5 HTC__A07 firmware
Required for flash:
- HTC One Dual Sim 802W device with good battery charged
- HTC One Dual Sim 802W tested firmware
- HTC One Dual Sim 802W Driver
- Micro usb cable
- Computer or Laptop
Procedure:
- Download firmware or driver from above link (if link not working just leave your comment on below comment box)
- Extract to desktop or as you like path (must be installed winrar software in your computer)
- Turn off device if on
- Press and hold Volume Down + Power button
- Select Fastboot mode and Press Power buttonInsert Micro usb cable into device
- Open ARUWizard.exe file
- Wait until full install
- After full flash device automatically reseting
- Congratulation you are done
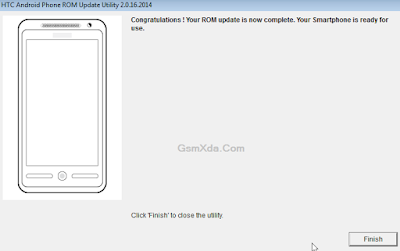
HTC One Dual Sim 802W Flash done with HTC ARUWizard flash tool screenshot:
Available link for download
Wednesday, March 1, 2017
How to Flash Karbonn Titanium S205 2GB with SPD Upgrade Tool tested
How to Flash Karbonn Titanium S205 2GB with SPD Upgrade Tool tested
Karbonn Titanium S205 2GB in any type issue software related you can easy solve using this method and this is for everyone who new fresher technician or experience technician in android software related, before use remember of must be working well all are required which you can see in this method it below to be mention, different to be error when you try to flash or upgrade first of USB not recognized this error possible when micro USB not working, battery not charged, phone USB socket not working properly so if you fail with this method just write down your comment on below comment box i will soon possible to fix it, first take backup into device if live otherwise dead you cant take backup, this method use when device in dead condition also but must be in software problem in hardware device not be live, you have to charge your battery with any charger, For backup in other devices you can use other external device like your hard drive, sd card or any other suitable devices.
This method you can use without any box its done from flash tool its also available here, and impotent of must be installed phones driver, you cant flash or upgrade if not installed in your computer or laptop it must be installed and also available in this post, here all are linked that tested and working fine just in one try, you can use this guide when your device in hang on logo, restarting, auto turn on internet connection, auto turn on wifi connection, auto apk installing, auto gone balance, pattern lock, screen lock etc these type issues you can use this way now lets see how to above mention software related issues solve using this method ?
This method you can use without any box its done from flash tool its also available here, and impotent of must be installed phones driver, you cant flash or upgrade if not installed in your computer or laptop it must be installed and also available in this post, here all are linked that tested and working fine just in one try, you can use this guide when your device in hang on logo, restarting, auto turn on internet connection, auto turn on wifi connection, auto apk installing, auto gone balance, pattern lock, screen lock etc these type issues you can use this way now lets see how to above mention software related issues solve using this method ?
Whats a Need for that ?
- Karbonn Titanium S205 2GB handset with well battery charged it up to 80%, do not try with low battery
- Karbonn Titanium S205 2GB tested Stock ROM Firmware | Download here
- Karbonn Titanium S205 2GB tested Flash tool | Download here
- Karbonn Titanium S205 2GB USB (Flashing) Driver | Download here
- Good Quality micro USB Cable
- Computer or Laptop
How to Flash or Upgrade ?
- Download tested all are required from above link, if link not working just leave your comment
- Extract to Desktop or as you like path from the WinZip, must be installed WinZip in your Computer or Laptop
- Open SPD Upgrade Tool and choose UpgradeDownload.exe file and open it from the double click
- Click on Firmware button it be first number and choose UTLTitanium_S205_2GBv1004.pac file
- Now Click on Download button it be Third number, Turn off device if it ON
- Press and hold Volume Down key and inset USB cable wait until driver installed, already that then start flashing automatically
- Wait until finished process, do not try to unplug while device in flashing mode
- Congratulation you are done
Karbonn Titanium S205 2GB Flash done Screenshot

Karbonn Titanium S205 2GB Flash done Video
Available link for download
Micromax Bolt A069 Flash done with Sp flash tool tested
Micromax Bolt A069 Flash done with Sp flash tool tested

If you have micromax bolt a069 and in that problem like hang on logo, pattern unlock, restarting problem then you can using this tutorial for that solution and if your device dead then you can use this tutorial but must to be in software related issue if your device hardware issue then you cant solve above mention issue so please care fully use this tutorial i suggest before use this tutorial first carefully read this tutorial after following this if software issue and not solve your problem then write down comment on below comment box i will soon good reply
This flash file tested by me without any error working well, you can use this flash file when your device hang on logo problem, restarting problem, security lock problem, password lock problem, pattern lock problem etc software related problem and you can use this tutorial without any box and this is free for all who know about software in mobile, impotent for flashing first must check your micro usb cable if not good then you cant flash it so check micro usb cable second check your device battery that is impotent for flashing if your device battery low so stop your device between flash so this is impotent for flash, before you flash save your data like contact, photos, videos etc because this is factory flash file so you cant save after full flash so must remember all are impotent notes.
Download Link
Micromax Bolt A069 Stock Rom or flash tool download here
Whats need for flash ? :
1. Micromax bolt A069 device with good battery charged
2. Micromax bolt A069 tested firmware or flash tool you can download from above link
3. Micro usb cable
4. Computer or Laptop
Procedure:
1. First download tested firmware or flash tool from above link (if link not working just write down your comment on below comment box)
2. Extract to desktop or as you like path (must installed winrar in your computer or laptop)
3. Open Sp flash tool folder and choose flash_tool.exe file and open it
4. Click on Scatter-loading button and choose MT6572_Android_scatter.txt file
5. Now click on Download button or shortcut key Ctrl + D
6. Press and hold Volume Up button and insert usb cable
7. Wait until driver install, if driver installed in your computer or laptop then downloading automatically start into device
8. Wait until full install os (do not disconnect device while in flashing mode)
9. Congratulation you are done from many software related issue
Micromax Bolt A069 Flash done with Sp flash tool screenshot:

Micromax Bolt A069 Flash done with Sp flash tool video HERE
Available link for download
Monday, February 27, 2017
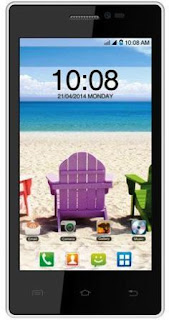
Intex Aqua N17 Flash done with Flash tool tested
Intex Aqua N17 Flash done with Flash tool tested
Before following this tutorial just remember some impotent tricks first if you following this tutorial just remember which is software version you want to flash it because if some choose wrong version and try in flash then your device will be dead or some issues so please carefully read all tutorial first after following because this is tested tutorial by me without any error also remember must be charged battery up to 80% to device also must be working well micro usb cable also must be working well of computer or laptop usb socket and last must be working well of device usb socket if any problem of above mention topic then you cant flash it.
This flash file tested by me without any error working well, you can use this flash file when your device hang on logo problem, restarting problem, security lock problem, password lock problem, pattern lock problem etc software related problem and you can use this tutorial without any box and this is free for all who know about software in mobile, impotent for flashing first must check your micro usb cable if not good then you cant flash it so check micro usb cable second check your device battery that is impotent for flashing if your device battery low so stop your device between flash so this is impotent for flash, before you flash save your data like contact, photos, videos etc because this is factory flash file so you cant save after full flash so must remember all are impotent notes.
Download Link
Intex Aqua N17 Firmware or Flash tool download here
Intex Aqua N17 USB (Flashing Driver) here
Required for flash:
1. Intex Aqua N17 device with good battery charged
2. Intex Aqua N17 tested firmware or flash tool
3. Intex Aqua N17 USB Driver
4. Micro usb cable
5. Computer or Laptop
Procedure:
1. First download tested firmware, flash tool or usb driver from above link (if link not working just leave your comment on below comment box)
2. Extract to desktop or as you like path (must be installed winrar software in your computer or laptop)
3. Open Flash tool folder and choose flash_tool.exe file and open it
4. Click on Scatter-loading button and choose MT6572_Android_scatter.txt file
5. Click on Download button
6. Press and hold Volume Up button and insert usb cable
7. Install driver (if driver installed in your computer then detect device automatically with computer)
8. Wait until full installed android os in your device (do not unplug device while device in flashing mode)
9. Congratulation you are done
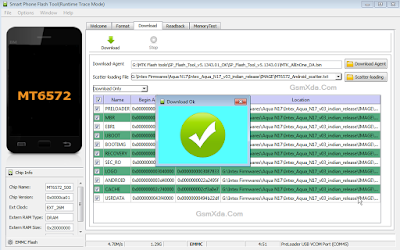
Intex Aqua N17 Flash done with Flash tool screenshot
Intex Aqua N17 Flash done with Flash tool video here
Available link for download
Friday, February 24, 2017
Samsung FRP Reset Files Using Odin tool
Samsung FRP Reset Files Using Odin tool

This file you can use with an odin flash tool this files factory reset file this is different file this security you cant remove via hard reset or full flash but you can be done with this files here some model files available but some few day full model available in this list. This security how to make ? when you purchase device then first start device it asking to gmail id or password and this must remember that if forgot then device do hard reset or flash then it asked firsts enter email id or password if remember then first start wifi and enter it if forgot then use this file.
Android Factory Reset Protection (FRP) this is new feature for your device protect and this feature has been added to Android OS 5.1 or higher
New Method Google Bypass Gmail Account
Supported models : Samsung Galaxy A3, A5, A7, J1, J2, J3, J5, J7, S5, S6, Edge, Note, Tab series google bypass Gmail account (FRP) SEE HERE
Model
Samsung G550FY FRP Reset File
Download
Samsung G920T FRP Reset File
Download
Samsung G925i FRP Reset File
Download
Samsung J700F FRP Reset File
Download
Samsung N920G FRP Reset File
Download
Samsung FRP Reset File MODEM G920F OJ1
Download
Samsung FRP Reset File MODEM G920I OJ6
Download
Samsung FRP Reset File MODEM G920T1 OI5
Download
Samsung FRP Reset File MODEM G920T1 OJ6
Download
Samsung FRP Reset File MODEM G920T OJ7
Download
Samsung FRP Reset File MODEM G920w8 OJ7
Download
Samsung FRP Reset File MODEM G925F OJ1
Download
Samsung FRP Reset File MODEM G925I OJ6
Download
Samsung FRP Reset File MODEM G925T OJ7
Download
Samsung FRP Reset File MODEM G925w8 OJ7
Download
Samsung FRP Reset File MODEM G928C OJ5
Download
Samsung FRP Reset File MODEM G928F OJ5
Download
Samsung FRP Reset File MODEM G928G OJ4
Download
Samsung FRP Reset File MODEM G928I OJ4
Download
Samsung FRP Reset File MODEM G928T OJ5
Download
Samsung FRP Reset File MODEM G928w8 OGD
Download
Samsung FRP Reset File MODEM N920C OJ5
Download
Samsung FRP Reset File MODEM N920G OJ4
Download
Samsung FRP Reset File MODEM N920I OJ4
Download
Samsung FRP Reset File MODEM N920T OJ5
Download
Samsung FRP Reset File MODEM N920w8 OI1
Download
Samsung FRP Reset File SBOOT G920F OJ1
Download
Samsung FRP Reset File SBOOT G920I OJ6
Download
Samsung FRP Reset File SBOOT G920t1 OI5
Download
Samsung FRP Reset File SBOOT G920t1 oj6
Download
Samsung FRP Reset File SBOOT G920t oj7
Download-1 | Download-2
Samsung FRP Reset File SBOOT G920w8 OJ7
Download
Samsung FRP Reset File SBOOT G925F OJ1
Download
Samsung FRP Reset File SBOOT G925I OJ6
Download-1 | Download-2
Samsung FRP Reset File SBOOT G925t oj7
Download
Samsung FRP Reset File SBOOT G925w8 OJ7
Download
Samsung FRP Reset File SBOOT G928C OJ5
Download
Samsung FRP Reset File SBOOT G928F OJ5
Download
Samsung FRP Reset File SBOOT G928G OJ4
Download
Samsung FRP Reset File SBOOT G928I OJ4
Download
Samsung FRP Reset File SBOOT G928t oj5
Download
Samsung FRP Reset File SBOOT G928w8 OGD
Download
Samsung FRP Reset File SBOOT N920C OJ5
Download
Samsung FRP Reset File SBOOT N920G OJ4
Download
Samsung FRP Reset File SBOOT N920I OJ4
Download
Samsung FRP Reset File SBOOT N920t oj5
Download
Samsung FRP Reset File SBOOT N920w8 OI1
Download
Samsung FRP Reset File G550FY
Download-1 | Download-2
Samsung FRP Reset File G920T
Download-1 | Download-2
Samsung FRP Reset File G925i OJ6 SBOOT MODEM
Download-1 | Download-2
Samsung FRP Reset File J700F
Download-1 | Download-2
Samsung FRP Reset File N920G
Download
Samsung SM-N920W8 Galaxy Note 5 FRP Sboot
8VLU2AOK5_Sboot Download
8VLU2BPC5_Sboot Download
8VLU2BPD6_Sboot Download
8VLU2BPE3_Sboot Download
Samsung FRP Reset File MODEM G920F OJ1
Download
Samsung FRP Reset File MODEM G920I OJ6
Download
Samsung FRP Reset File MODEM G920T1 OI5
Download
Samsung FRP Reset File MODEM G920T1 OJ6
Download
Samsung FRP Reset File MODEM G920T OJ7
Download
Samsung FRP Reset File MODEM G920w8 OJ7
Download
Samsung FRP Reset File MODEM G925F OJ1
Download
Samsung FRP Reset File MODEM G925I OJ6
Download
Samsung FRP Reset File MODEM G925T OJ7
Download
Samsung FRP Reset File MODEM G925w8 OJ7
Download
Samsung FRP Reset File MODEM G928C OJ5
Download
Samsung FRP Reset File MODEM G928F OJ5
Download
Samsung FRP Reset File MODEM G928G OJ4
Download
Samsung FRP Reset File MODEM G928I OJ4
Download
Samsung FRP Reset File MODEM G928T OJ5
Download
Samsung FRP Reset File MODEM G928w8 OGD
Download
Samsung FRP Reset File MODEM N920C OJ5
Download
Samsung FRP Reset File MODEM N920G OJ4
Download
Samsung FRP Reset File MODEM N920I OJ4
Download
Samsung FRP Reset File MODEM N920T OJ5
Download
Samsung FRP Reset File MODEM N920w8 OI1
Download
Samsung FRP Reset File SBOOT G920F OJ1
Download
Samsung FRP Reset File SBOOT G920I OJ6
Download
Samsung FRP Reset File SBOOT G920t1 OI5
Download
Samsung FRP Reset File SBOOT G920t1 oj6
Download
Samsung FRP Reset File SBOOT G920t oj7
Download-1 | Download-2
Samsung FRP Reset File SBOOT G920w8 OJ7
Download
Samsung FRP Reset File SBOOT G925F OJ1
Download
Samsung FRP Reset File SBOOT G925I OJ6
Download-1 | Download-2
Samsung FRP Reset File SBOOT G925t oj7
Download
Samsung FRP Reset File SBOOT G925w8 OJ7
Download
Samsung FRP Reset File SBOOT G928C OJ5
Download
Samsung FRP Reset File SBOOT G928F OJ5
Download
Samsung FRP Reset File SBOOT G928G OJ4
Download
Samsung FRP Reset File SBOOT G928I OJ4
Download
Samsung FRP Reset File SBOOT G928t oj5
Download
Samsung FRP Reset File SBOOT G928w8 OGD
Download
Samsung FRP Reset File SBOOT N920C OJ5
Download
Samsung FRP Reset File SBOOT N920G OJ4
Download
Samsung FRP Reset File SBOOT N920I OJ4
Download
Samsung FRP Reset File SBOOT N920t oj5
Download
Samsung FRP Reset File SBOOT N920w8 OI1
Download
Samsung FRP Reset File G550FY
Download-1 | Download-2
Samsung FRP Reset File G920T
Download-1 | Download-2
Samsung FRP Reset File G925i OJ6 SBOOT MODEM
Download-1 | Download-2
Samsung FRP Reset File J700F
Download-1 | Download-2
Samsung FRP Reset File N920G
Download
Samsung SM-N920W8 Galaxy Note 5 FRP Sboot
8VLU2AOK5_Sboot Download
8VLU2BPC5_Sboot Download
8VLU2BPD6_Sboot Download
8VLU2BPE3_Sboot Download
Available link for download
Thursday, February 23, 2017
Micromax X222 flash done with flash tool
Micromax X222 flash done with flash tool

This flash file tested by me without any error working well, you can use this flash file when your device hang on logo problem, restarting problem, security lock problem, password lock problem, pattern lock problem etc software related problem and you can use this tutorial without any box and this is free for all who know about software in mobile, impotent for flashing first must check your micro usb cable if not good then you cant flash it so check micro usb cable second check your device battery that is impotent for flashing if your device battery low so stop your device between flash so this is impotent for flash, before you flash save your data like contact, photos, videos etc because this is factory flash file so you cant save after full flash so must remember all are impotent notes.
Download Link
Micromax X222 V4_160113_HW1.4 SWV22 Download here
FlashTool_UI_exe_v5.1120.00 Download here
Required for flash:
1. Micromax X222 phone with good battery charged
2. Micromax X222 tested flash file or flash tool
3. Micro usb cable
4. Computer or Laptop
Procedure:
1. Take tested flash file or flash tool from above link (if link not working just write down comment on below comment box)
2. Extract to both zip file to desktop or as you like path (must be installed winrar software in your computer or laptop)
3. Open FlashTool_UI_exe_v5.1120.00 folder and choose flash_tool.exe file and open it
4. Click on Scatter/Config File button and choose scatTINNO52_10A_GEMINI64.txt file from firmware folder
5. Now click on Download button
6. Press and hold Center key and insert usb cable (must be working well center key in device)
7. Wait until driver install, if driver installed in your computer or laptop then device automatically detect to flash tool and starting flash
8. Wait until full flash (do not disconnect while flashing)
9. You are done
Micromax X222 flash done with flash tool Screenshot:

Micromax X222 flash done with flash tool video:
Available link for download
Sunday, February 19, 2017
Intex Aqua N15 Simple Flash done With SP Flash tool tested
Intex Aqua N15 Simple Flash done With SP Flash tool tested
Experience with this device when i flashing:
When customer take to device come our shop for solve software related problem so before flash do charged battery up to 80% for flashing need to charged device battery otherwise stop between flashing so first charged battery after i check device for actually what happen in this device so problem is device restarting so if device restarting issue you can hard reset for this solution some time this problem easy solve using hard reset but this way not for all time this tutorial not for only restarting problem solved but you can use when your device in hang on logo problem, pattern lock problem, many problems but remember to be software related after, second preparation micro usb cable this is also most impotent if any problem in that so you cant flashing error like usb not recognized, third preparation i check device usb socket its detect to pc or not so that also working well after i deiced to flash and first try i was success with this device and working well, now see stock rom description what happen if you use this stock rom firmware ?
Experience with Stock Rom Firmware:
This flash file tested by me without any error working well, you can use this flash file when your device hang on logo problem, restarting problem, security lock problem, password lock problem, pattern lock problem etc software related problem and you can use this tutorial without any box and this is free for all who know about software in mobile, impotent for flashing first must check your micro usb cable if not good then you cant flash it so check micro usb cable second check your device battery that is impotent for flashing if your device battery low so stop your device between flash so this is impotent for flash, before you flash save your data like contact, photos, videos etc because this is factory flash file so you cant save after full flash so must remember all are impotent notes.
Download Link
Intex Aqua N15 Stock Rom Firmware Download
Intex Aqua N15 Flash tool Download Link-1 | Link-2
Intex Aqua N15 USB Driver Download
Need for Flash:
1. Intex Aqua N15 device
2. Intex Aqua N15 stock rom firmware
3. Intex Aqua N15 Flash tool
4. Intex Aqua N15 USB driver
5. Micro usb cable
6. Computer or Laptop
How to Flash Intex Aqua N15 with Flash tool ?
1. First all are required download from above link (if link broke then just leave your comment)
2. Extract to all are from winrar to desktop or any path (must installed winrar)
3. Install usb driver (link are above | if link broke just leave your comment)
4. Open SP flash tool and choose flash_tool.exe file and open it
5. Click on Scatter-loading button and choose MT6582_Android_scatter.txt file
6. Now click on Download button then Press and hold Volume Up button and insert usb cable
7. Wait until driver install, after installed driver then detect device with computer
8. Wait until full process (do not disconnect while device in flashing mode)
9. Congratulation you are done
Intex Aqua N15 Flash done Screenshot:

Available link for download
Saturday, February 11, 2017
Micromax Canvas Duet II EG111 Flash done with flash tool
Micromax Canvas Duet II EG111 Flash done with flash tool

This flash file tested by me without any error working well, you can use this flash file when your device hang on logo problem, restarting problem, security lock problem, password lock problem, pattern lock problem etc software related problem and you can use this tutorial without any box and this is free for all who know about software in mobile, impotent for flashing first must check your micro usb cable if not good then you cant flash it so check micro usb cable second check your device battery that is impotent for flashing if your device battery low so stop your device between flash so this is impotent for flash, before you flash save your data like contact, photos, videos etc because this is factory flash file so you cant save after full flash so must remember all are impotent notes.
Download Link
Micromax Canvas Duet II EG111 Firmware or flash tool download from here
Required for flash:
- Micromax Canvas Duet II EG111 device with good battery charged
- Micromax Canvas Duet II EG111 firmware or flash tool (tested)
- Micro usb cable
- Computer or Laptop
Procedure:
- Download tested firmware or flash tool from above link (if link not working just write down comment on below comment box)
- Extract to zip file in desktop or as you like path (must be installed winrar software in your computer or laptop)
- Open DownloadTools_V1.4 folder and choose DownloadTools.exe file and open it
- Untick on Bootload option and Tick on FastBoot Upgrade option
- Click on Browse... button and choose emmc_update_all.bat file
- Now Click on Start button
- Press and hold Volume Down + Power button few second for FastBoot mode
- Attach Micro usb cable (micro usb cable must be working well)
- Wait until driver install, if driver installed in your computer or laptop then downloading automatically into device
- Wait until full install (do not disconnect device while flashing)
- You are done
Micromax Canvas Duet II EG111 Flash done with flash tool screenshot:

Micromax Canvas Duet II EG111 Flash done with flash tool video:
Available link for download
How to Flash Lenovo A526 with Flash Tool Tested
How to Flash Lenovo A526 with Flash Tool Tested
Lenovo A526 in any type issue software related you can easy solve using this method and this is for everyone who new fresher technician or experience technician in android software related, before use remember of must be working well all are required which you can see in this method it below to be mention, different to be error when you try to flash or upgrade first of USB not recognized this error possible when micro USB not working, battery not charged, phone USB socket not working properly so if you fail with this method just write down your comment on below comment box i will soon possible to fix it, first take backup into device if live otherwise dead you cant take backup, this guide you can use when device in dead condition also but must be in software related issue otherwise if any hardware then you can solve that.
Must Read :
If you want to repair your device, you can try to repair it by you. You have to charge your battery with any charger and charged it by 80%. Your data is very important for you so it is good to do a backup of your data it may consist like your contact details,your important messages, your emails or any other important thing which you feel to be the backup in your device. This backup can be done on another device. we have to do the backup because after a format of your device, all your data will be gone and it will not be recovered. For backup in other devices you can use other external device like your hard drive, SD card or any other suitable devices. If you are doing by your own.do it at your own risk as we dont take any responsibility if your device is damaged, this flash file tested by me without any error working well.
Requisite for Lenovo A526
- Lenovo A526 device with good battery charged, do not try with low battery
- Lenovo A526 Stock ROM Firmware | Download here
- Lenovo A526 Flash Tool | Download here
- Lenovo A526 USB (Flashing) Driver | Download here
- Good Quality Micro USB Cable
- Computer or Laptop
Procedure for Lenovo A526
- First take all of files which need for flashing or upgrade from the above link, if link not working just leave your comment on below comment box
- Install WinRAR software in your Computer or Laptop, already installed then ignore
- UnZIP to any path you want from the WinRAR
- Open Sp Flash tool and choose flash_tool.exe file and open it
- Click on Scatter-loading button and choose MT6582_scatter_W1315V15V111.txt file
- Again Click on Download button and Just Insert USB Cable to Device, wait until driver installing already driver installed then download start automatically, if driver not installed then try to manual update from the above links driver
- Id device dead and not detect after insert USB Cable to device then try to Press and hold Volume Up button and Insert USB Cable (Note: You can use Volume Down button also for detection)
- Wait until finished process, do not try to unplug while device in flashing mode
- Congratulation you are done
Lenovo A526 Flash done Screenshot:

Available link for download
Thursday, February 9, 2017
How to boot repair or Flash Redmi Note 2 Prime Dual Sim 4G Model 2014912 with Flash tool Tested
How to boot repair or Flash Redmi Note 2 Prime Dual Sim 4G Model 2014912 with Flash tool Tested
This tutorial tested by me without any error some time we are flashing this device so many time take in flashing so we are search other tool for flashing and easy to flash this device from the many time i search but after many time i found other flash tool and i try this device in this tool so easy procedure easy or not was give many time for flashing so this tool with i have experience so here post new with different tool but here some different procedure from the before flashing tool this tool you can use if before post not success then you can use this tool if you want to first try use so dont worry because this is tested by me its very easy to flash and just remember of required for flashing if any issue in required from yours so first prepare to required after try in flash and we are mention which need to flashing in below and also must remember before use this tutorial which one first read all carefully this tutorial after try in flash because if you read tutorial then you can easy flashing this device this my own experience and must be working well micro USB cable if any issue in this then you cant connect device with computer or laptop also must be working device charging socket if any issue so also you cant connect with computer or laptop must be installed driver in your computer or laptop if not install in your computer or laptop then device not connect so you cant flash see below description about firmware.
If you want to repair your device, you can try to repair it by you.
You have to charge your battery with any charger and charged it by 70%, Your data is very important for you so it is good to do a backup of your data it may consist like your contact details, your important messages, your emails or any other important thing which you feel to be the backup in your device, this backup can be done on another device. we have to do the backup because after a format of your device, all your data will be gone and it will not be recovered. For backup in other devices you can use other external device like your hard drive, sd card or any other suitable devices. If you are doing by your own.do it at your own risk as we dont take any responsibility if your device is damaged.Required for flash:
- Redmi Note 2 Prime (Dual Sim 4G) Model : 2014912 device with well battery charged, and do not try with low battery
- Redmi Note 2 Prime (Dual Sim 4G) Model : 2014912 Stock ROM Firmware (tested) | Download Mirror-1, Mirror-2
- Redmi Note 2 Prime (Dual Sim 4G) Model : 2014912 USB (Flashing) OR Dead Boot Repair driver | Download here
- Redmi Note 2 Prime (Dual Sim 4G) Model : 2014912 Flash Tool | Download here
- Good Quality Micro usb cable
- Computer or Laptop
Procedure:
- First download tested Firmware, Flash tool or driver from above link (if link not working just leave your comment on below comment box i will soon fix it)
- Extract to all are zip files to desktop or as you like path (must be installed winrar software to Extract)
- Open Driver folder and choose Qualcomm_USB_Driver_Setup.exe file and wait until finish installation
- Open QPST.WIN.2.7_Installer-00430.1 folder and chose setup.exe file and open and install it
- Now open QFIL from the "C:Program FilesQualcommQPST in" path
- Tick on Flat Build option
- Go to Programmer Path and click on Browse.. button and choose prog_emmc_firehose_8916.mbn file
- Click on Load XML.. button and choose rawprogram_unsparse.xml file and second choose patch0.xml file from the Firmware folder
- Insert USB cable and wait until driver install
- After drier installed just Click on Download button and wait until finish procedure
- Congratulation you are done
Redmi Note 2 Prime Dead Boot Repair done Screenshot:

Available link for download
Wednesday, February 8, 2017
Intex Aqua Life II Flash done with flash tool
Intex Aqua Life II Flash done with flash tool

This flash file tested by me without any error working well, you can use this flash file when your device hang on logo problem, restarting problem, security lock problem, password lock problem, pattern lock problem etc software related problem and you can use this tutorial without any box and this is free for all who know about software in mobile, impotent for flashing first must check your micro usb cable if not good then you cant flash it so check micro usb cable second check your device battery that is impotent for flashing if your device battery low so stop your device between flash so this is impotent for flash, before you flash save your data like contact, photos, videos etc because this is factory flash file so you cant save after full flash so must remember all are impotent notes.
Download Link
Intex Aqua Life II firmware or flash tool download from here
Required for flash:
1. Intex Aqua Life II device with good battery charged
2. Intex Aqua Life II tested firmware or flash tool
3. Micro usb cable
4. Computer or Laptop
Procedure:
1. Take of all needed for flashing device from above link (if link not working then write down comment on below box)
2. Extract to desktop or as you like path (must installed winrar software in computer or laptop)
3. Open SPD Upgrade Tool vR2.9.9015 folder and choose UpgradeDownload.exe file and open it
4. Click on Firmware button (button like setting) and choose SC7731_V120_KEW_281_V1.9_150624.pac file from Firmware folder
5. Now Click on Start button (button like Play)
6. Press and hold Volume Down key and insert usb cable (must be working well micro usb cable or device key)
7. Wait until driver install, if driver installed in your computer or laptop then downloading automatically start in to device
8. Wait until full install (note : do not disconnect device while flashing)
9. You are done
Intex Aqua Life II Flash done with flash tool screenshot:

Intex Aqua Life II Flash done with flash tool video :
Available link for download
Subscribe to:
Posts (Atom)